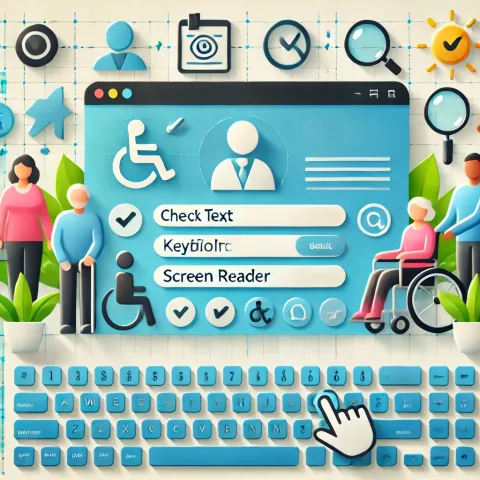
Enhance user experience for all visitors by making simple adjustments that ensure your website is accessible to people with disabilities.
Key Takeaways:
- Learn practical, easy-to-implement steps for improving web accessibility.
- Understand how small changes can make a big difference for users with disabilities.
- Discover the benefits of making your website accessible to a broader audience.
1. Introduction: Why Simple Accessibility Fixes Matter
Website accessibility means designing websites that everyone can use, regardless of their abilities or disabilities. Small, straightforward changes can make a huge impact on improving accessibility without requiring a complete site overhaul.
By following some basic guidelines, you can improve the usability of your website for people who rely on screen readers, keyboard navigation, or assistive technology. Accessibility isn’t just a legal or ethical requirement; it also enhances user experience and can increase your audience reach.
Actionable Tip/Pro Advice:
Before implementing these tips, conduct a quick accessibility audit using tools like WAVE or Axe DevTools to understand your starting point.
2. Use Descriptive Alt Text for Images
Alt text allows screen readers to describe images to visually impaired users. Without it, these users miss out on the context that images provide.
Ensure every image on your website has relevant, descriptive alt text. Describe the image in a way that conveys its purpose or meaning. For purely decorative images, use empty alt text (alt="") to allow screen readers to skip them.
Pro Tip:
Avoid phrases like "image of" or "picture of" in your alt text. Instead, describe what the image shows or its function.
3. Ensure Your Website is Keyboard Accessible
Some users rely entirely on keyboards to navigate websites, often due to mobility impairments. Your site should be fully functional using just a keyboard.
Make sure all interactive elements like links, buttons, and forms can be accessed and activated via keyboard navigation (using the Tab key). Provide clear visual indicators for focus states (e.g., highlight or underline elements when selected).
Actionable Tip:
Test your site by navigating through it using only your keyboard. See if you can easily access every interactive element.
4. Use Proper Heading Structure
A logical heading structure improves navigation for both screen readers and sighted users, providing a clear content hierarchy.
Ensure that your website uses proper HTML heading tags (<h1>, <h2>, <h3>, etc.) in the correct order. Each page should have one <h1> as the main title, with <h2> for sections and <h3> for subsections.
Pro Tip:
Avoid skipping heading levels (e.g., jumping from <h1> to <h3>), as this can confuse both users and assistive technologies.
5. Add Meaningful Link Descriptions
Links should clearly describe where they lead. Ambiguous text like "click here" or "read more" doesn't provide enough context, especially for screen reader users.
Use descriptive link text that tells users what they’ll find if they follow the link (e.g., “View our services” instead of “Click here”). This helps all users, especially those using screen readers, understand the link's purpose.
Pro Tip:
When possible, embed the purpose of the link within the sentence, making it clear and natural.
6. Provide Text Transcripts and Captions for Multimedia
Video and audio content is a popular form of communication, but it can be inaccessible to users with hearing or visual impairments.
For every video, include captions for users with hearing impairments. For audio content, offer transcripts that visually impaired users can read via screen readers.
Actionable Tip:
Use automated captioning tools like YouTube’s auto-captions or services like Rev.com to quickly add captions to your multimedia.
7. Use High Contrast Colors
Low contrast between text and background colors makes it difficult for users with low vision or color blindness to read content.
Ensure a strong contrast ratio (at least 4.5:1) between your text and background. This improves readability for everyone, including users with vision impairments.
Pro Tip:
Use the Color Contrast Analyzer tool to check whether your color choices meet the recommended contrast ratios for accessibility.
8. Create Accessible Forms
Forms are an essential part of most websites, from sign-ups to contact pages. Making them accessible ensures that all users can complete them.
Use clear labels for all form fields, associating them directly with their respective inputs using the <label> element. Include instructions for required fields and make error messages easy to understand.
Pro Tip:
Provide meaningful error messages that explain what went wrong, such as “Please enter a valid email address,” rather than generic “Input invalid” messages.
9. Make Your Content Readable
Accessible content is not only about technology but also about how you present information. Complex language can be a barrier for many users.
Write in clear, simple language whenever possible. Break long paragraphs into smaller chunks, use bullet points, and add visual breaks (such as images or headings) to improve readability.
Pro Tip:
Use online tools like Hemingway Editor to assess the readability of your content, aiming for a grade 8 reading level or lower to ensure maximum comprehension.
10. Test Your Website with Real Users
Automated tools can help you identify many accessibility issues, but real-world testing is invaluable. Feedback from actual users with disabilities offers insights that tools can miss.
Once you’ve implemented these accessibility improvements, conduct usability tests with users who rely on screen readers, keyboard navigation, or other assistive technologies. Their feedback will highlight areas for further improvement.
Actionable Tip:
Join online communities or forums where users with disabilities can help test your website, or partner with an accessibility consultant.
Final Thoughts
Improving your website’s accessibility is easier than you might think. By adding alt text, using proper heading structures, making forms accessible, and testing your site with real users, you can create a website that welcomes everyone.
Start implementing these 10 simple steps today to make your website more inclusive and accessible. Stay tuned for more in-depth accessibility guides in our blog section!
